- +91-9805817494
- List Item #2
- List Item #3

Services
Web Design
- Custom Website Design
- UI/UX Design
- Responsive Web Design
- Website Resdesign
- Wordpress Web Design
- Ecommerce Web Design
Web Development
- Custom Web Development
- Full-Stack Development
- CMS Development
- PHP Development
- Web App Development
- API Integration
Web Solutions
- Website Migration
- Website Maintenance
- Website Speed Optimization
- Website Security
- Support & Management
- Bug Fixing & Troubleshooting
Resources
Get Your Free Quote Now
Get a free quote for an SEO-friendly website designed to support your business goals and online visibility.
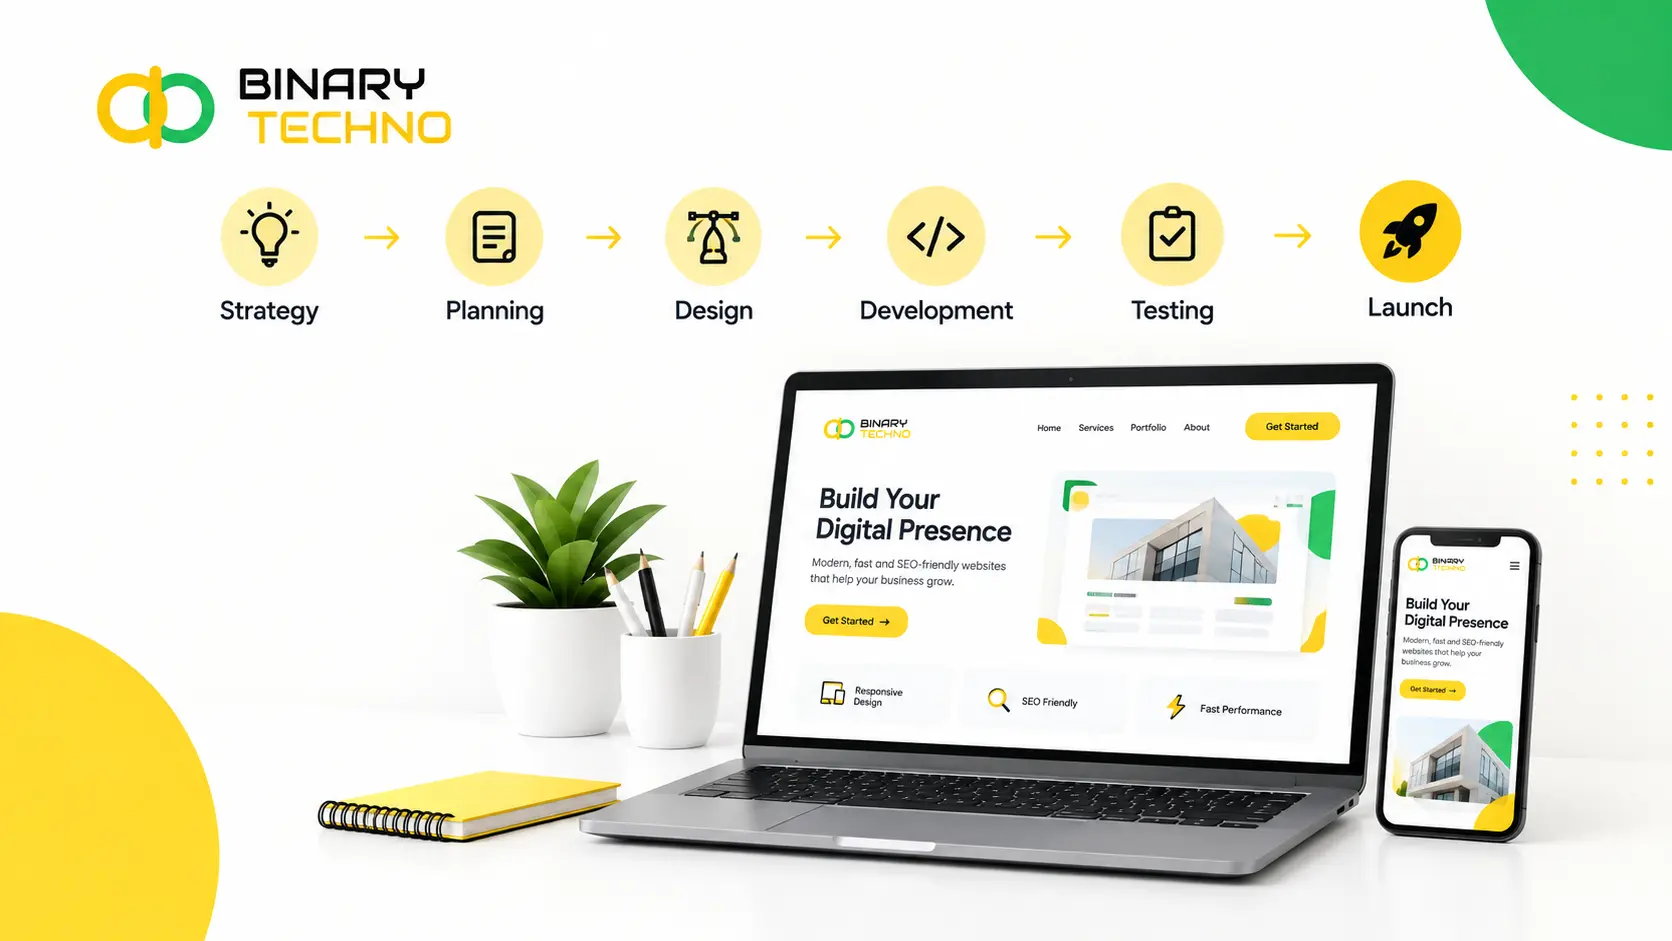
Website Design Process : From Strategy to Launch
Objective
To help business owners, marketers, and beginners understand each stage of the website design process, from strategy to launch. The blog explains why a structured approach matters, how long each stage takes, and which tools are used. It also builds trust and encourages readers to contact you for their website project.
Every successful website follows a clear process, and knowing it saves you time, money, and stress. Before any design work starts, you need to define your goals, understand your audience, and decide what visitors should do, such as buy, book, or contact you.
Once the strategy is set, the real work begins. Designers map out the site structure, create wireframes (simple page layouts), and then add colors, fonts, and images. Developers turn the design into a working site, and content is written to guide visitors clearly.
Before launch, the site is tested on phones, tablets, and computers to catch errors, speed issues, and broken links. In this guide, we’ll explain each step simply, so you know exactly what to expect and how to launch with confidence.
Key Takeaways
- The website design process is a step-by-step method for planning, designing, building, testing, and launching a website.
- Always start with clear goals and a clear understanding of your audience before any design work begins.
- The main steps are strategy, research, wireframes, visual design, content, development, testing, and launch.
- Wireframes help you fix layout problems early, when changes are quick and cheap.
- Prepare your content early, because late content is a common cause of project delays.
- Testing on different devices and browsers, and with real users, prevents costly mistakes after launch.
- Most websites take between 4 weeks and 6 months, depending on size, features, and feedback speed.
- Launching is not the end. Use visitor data to keep improving your website over time.
Did You Know?
In August 2026, mobile devices represented 50.13% of worldwide web traffic, compared with 49.87% for desktop. This supports your point about designing websites with mobile users in mind.
Table of Contents
What Is the Website Design Process?
The website design process is the step-by-step method used to plan, design, build, test, and launch a website. It turns a rough idea (“we need a new site”) into a finished product that looks good, works well, and helps a business reach its goals.
Think of it as a roadmap. Without one, projects drift. Pages get designed before anyone knows what they’re for. Content arrives late. Features get added halfway through, and the budget quietly doubles.
With a roadmap, everyone knows what happens next.
Most professional teams follow the same core stages, even if they use different names:
- Discovery and strategy: setting goals and learning about the audience
- Research and planning: competitor review, sitemap, and content plan
- Wireframing: basic page layouts with no styling
- Visual design: colors, fonts, images, and page mockups
- Content creation: writing text, choosing photos, and preparing videos
- Development: turning designs into a working website
- Testing: checking for bugs, speed, and usability
- Launch and improvement: going live, then learning from real visitors
Two terms come up often, so it helps to know them. UX (user experience) design is about how a website works and feels: how easily someone finds a product, reads a page, or fills out a form. UI (user interface) design is about how it looks: buttons, colors, typography, and spacing. A strong website needs both.
The process also isn’t only for big companies. A local bakery, a freelance photographer, and a software startup all need the same basic thinking. The only differences are the size of each step and how much time each one takes.
Why a Structured Website Design Process Matters
You can technically build a website without a plan. Many people do. But most of them end up rebuilding it within a year or two. Here’s why a structured process is worth the effort.
It keeps the project tied to business goals.
A website isn’t a digital brochure. It’s a working part of your business. When you define goals first, such as “get 50 booking requests a month” or “sell 200 products online,” every later decision has a clear test: does this help us reach the goal?
If the answer is no, it doesn’t go on the page.
It saves time and money.
Fixing a mistake on a wireframe takes minutes. Fixing the same mistake after development takes days, because code has to be rewritten. A good process catches problems early, when they’re cheap.
Delays usually come from unclear goals, late content, or too many changes at the end. A structured process reduces all three.
It creates a better experience for visitors.
People don’t visit websites to admire them. They come with a question or a task. A clear process puts the visitor first through research, logical navigation, and testing with real users. The result is a site that feels easy to use.
It supports search engine visibility.
Good SEO-friendly website design doesn’t start after launch. It starts with the site structure, page speed, mobile design, and content planning. When these are handled during the design process, search engines can find and understand your pages much more easily.
It improves teamwork.
A website involves many people: designers, developers, writers, marketers, and business owners. A defined process gives each person a clear role and a clear time to give feedback. This avoids the classic problem of five people giving conflicting opinions on the final design.
Not sure which step your website needs the most help with?
Step-by-Step Website Design Process
Here’s the full journey, from first idea to launch day and beyond.
Step 1: Discovery and Strategy
This is the foundation. Before opening any design tool, the team gathers answers to some basic questions:
- What is the main goal of the website?
- Who are the ideal visitors, and what do they need?
- What action should visitors take on each page?
- What makes this business different from competitors?
- How will success be measured?
Goals should be specific. “Look more professional” is hard to measure. Increase contact form submissions by 30% in six months” is something you can track.
You’ll also define audience personas: short profiles of typical visitors. For example, “Priya, 34, a busy office manager who wants to book a cleaning service from her phone during lunch. ” Personas help the team design for real people instead of guesses.
Pro Tip: Write a one-sentence purpose for your website before anything else. Example: “This website helps local homeowners book trusted plumbers in under two minutes.” If a page or feature doesn’t support that sentence, question whether it belongs.
Step 2: Research and Planning
With goals set, it’s time to look outward. Research usually covers:
- Competitor review: What do similar websites do well? Where are they weak?
- Keyword research: What words do people search for when looking for your product or service?
- Existing site audit: If you’re doing a website redesign, which pages perform well and which don’t?
- Technical needs: Do you need online payments, booking, logins, or multiple languages?
Then comes the sitemap, a simple map of all the pages and how they connect. A basic business sitemap might look like: Home → About, Services (with individual service pages), Blog, Contact.
A good sitemap keeps navigation simple. A common guideline is that visitors should reach any important page within three clicks.
Step 3: Wireframing
A wireframe is a bare-bones blueprint of a page. It uses boxes, lines, and placeholder text to show where things go, such as the logo, menu, headline, images, buttons, and footer. There are no colors, no fonts, no photos.
That’s intentional. Without visual distractions, everyone can focus on the questions that matter most:
- Is the most important information easy to find?
- Is the call-to-action button clear and visible?
- Does the page flow in a logical order?
Wireframes are also the best time to plan for mobile. Since most web traffic worldwide now comes from phones, designing the mobile layout early (or even first) leads to better results. This approach is often called mobile-first design.
Some teams also create interactive prototypes at this stage: clickable wireframes that let stakeholders and test users “try” the site before any code is written.
Step 4: Visual Design (UI Design)
Now the site gets its personality. Designers build on the approved wireframes and add:
- Color palette: usually a main color, a secondary color, and neutral shades
- Typography: fonts for headings and body text that are easy to read
- Imagery: photography, illustrations, icons, or video
- Buttons, forms, and menus: styled to be clear and consistent
- Spacing and layout: enough white space so pages don’t feel crowded
The result is a set of mockups: realistic pictures of what each key page will look like. Most designers also create a small style guide listing the colors, fonts, and button styles, so the site stays consistent as it grows.
Accessibility matters here too. Text needs enough contrast against its background, buttons need to be large enough to tap, and images need descriptions for screen readers. Following the Web Content Accessibility Guidelines (WCAG) makes your site usable for more people, including those with visual, hearing, or motor difficulties.
Step 5: Content Creation
Content is the part most often left for last, and the reason many websites launch late. A design with placeholder text (“Lorem ipsum”) can look perfect, but real content changes everything. A headline may be twice as long as expected, or a product may need five photos instead of one.
Content work includes:
- Writing page copy, headings, and button text
- Preparing product descriptions, service details, and FAQs
- Taking or selecting photos and videos
- Writing meta titles and descriptions for search engines
- Planning a blog or resource section
Pro Tip: Write for scanning. Most visitors skim. Use short paragraphs, clear headings, and bullet points. Put the most important message at the top of each page.
Ideally, content is developed alongside design, not after it. When words and visuals are created together, the page feels natural instead of forced.
Step 6: Website Development
Here the approved designs become a working website. Developers work in two areas:
- Front-end development: everything visitors see and interact with (layout, menus, animations, forms), built with HTML, CSS, and JavaScript.
- Back-end development: everything behind the scenes, such as databases, user accounts, payment systems, and the content management system (CMS).
Many websites are built on a CMS like WordPress, Webflow, Shopify, or Wix, which lets non-technical people update content without touching code. The right choice depends on your needs: a simple portfolio has very different requirements than a store with thousands of products.
Good development also builds in mobile responsive web design, which means the site automatically adjusts to any screen size, from a small phone to a wide desktop monitor. Developers also focus on clean code, fast loading, and basic security such as SSL certificates (the “https” in your web address).
Most teams first build on a staging site, a private copy of the website, so nothing goes public until it’s ready.
Step 7: Testing and Quality Assurance
Before launch, the website needs a thorough check. Testing usually covers:
- Functionality: Do all forms, buttons, links, and payment steps work?
- Cross-browser testing: Does it look right on Chrome, Safari, Firefox, and Edge?
- Device testing: Does it work on different phones, tablets, and screen sizes?
- Speed: Do pages load quickly? Google research has found that more than half of mobile visitors leave if a page takes longer than three seconds to load.
- SEO basics: Are page titles, meta descriptions, headings, image descriptions, and redirects set up properly?
- Accessibility: Can the site be used with a keyboard and a screen reader?
- Usability: Can real people complete key tasks without help?
That last one is often skipped, and it shouldn’t be. Even a simple test, where you ask five people to complete a task while you watch, reveals problems the team missed. If someone struggles to find the contact page, that’s a design issue, not a user issue.
Step 8: Launch and Post-Launch Improvement
Launch day should be calm, not chaotic. A simple website launch checklist helps:
- Final backup of the staging site
- Domain name connected and SSL working
- Redirects set up for old pages (important for redesigns, to protect your search rankings)
- Analytics and tracking tools installed
- Sitemap submitted to Google Search Console
- Forms and payment systems tested on the live site
- “Noindex” tags removed so search engines can find the pages
- Social media, email, and other channels updated with the new link
After launch, the work isn’t over. In fact, this is when you finally get real data. Watch how visitors behave: which pages they read, where they leave, and which buttons they click. Then make improvements based on what you see.
A website is never truly “finished.” The best-performing sites are updated regularly with fresh content, new features, and small design improvements.
How Long Does the Website Design Process Take?
The honest answer: it depends on the size and complexity of the site. Most projects fall somewhere between 4 weeks and 6 months.
Here’s a general guide:
Website Type | Typical Timeline | Examples |
Simple website (5–10 pages) | 4–8 weeks | Small business, portfolio, local service |
Medium business website | 8–12 weeks | Company site with blog, multiple services |
Ecommerce website | 3–6 months | Online store with product catalog, payments |
Custom or complex website | 6 months or more | Web app, membership platform, custom features |
These are estimates, not promises. Timelines change based on the factors below.
What affects the timeline?
- Number of pages and features: More pages and custom functions mean more design and development time.
- Speed of feedback: This is the biggest factor. If approvals take a week each round, a 6-week project can stretch to 12.
- Content readiness: Waiting for copy, photos, or product data is one of the most common causes of delay.
- Number of revision rounds: Two rounds of feedback per stage is a healthy standard. Endless changes slow everything down.
- Team size and availability: A larger team can work in parallel, while a solo designer works step by step.
- Integrations: Connecting to payment systems, CRMs, booking tools, or third-party software adds testing time.
A sample timeline for a medium-sized website
- Weeks 1–2: Discovery, strategy, and research
- Weeks 2–3: Sitemap and wireframes
- Weeks 3–5: Visual design and mockups
- Weeks 4–7: Content creation (running alongside design)
- Weeks 6–10: Development
- Weeks 10–11: Testing and fixes
- Week 12: Launch
Tools Used During the Website Design Process
The right tools make each stage faster and clearer. Here are widely used options, grouped by purpose. You don’t need all of them; choose what fits your project and budget.
Planning and research
- Google Analytics and Google Search Console: see how existing visitors behave and which pages appear in search.
- Semrush or Ahrefs: research keywords and study competitors.
- Notion, Trello, or Asana: organize tasks, deadlines, and feedback.
Sitemaps and wireframes
- Figma or FigJam: design wireframes and collaborate in real time.
- Miro or Whimsical: quick brainstorming, flowcharts, and sitemaps.
- Slickplan: dedicated sitemap and site structure planning.
Visual design and prototyping
- Figma: the most popular tool for UI design, mockups, and clickable prototypes.
- Sketch: a design tool used mainly by Mac users.
- Canva: simple graphics and social visuals for non-designers.
- Google Fonts and Colors: find font pairings and build color palettes.
Development and website platforms
- WordPress: flexible and widely used, with thousands of themes and plugins.
- Webflow: visual, design-focused building with clean code.
- Shopify: built for online stores.
- Wix and Squarespace: beginner-friendly builders for smaller sites.
- Visual Studio Code and GitHub: for custom coding and version control.
Testing and optimization
- Google PageSpeed Insights and Lighthouse: measure speed, accessibility, and SEO basics.
- BrowserStack: test how your site looks on many browsers and real devices.
- Screaming Frog: find broken links, missing titles, and technical SEO issues.
- Hotjar or Microsoft Clarity: heatmaps and recordings that show how people use your pages.
Have questions about your website design process?
Conclusion
A great website doesn’t happen by accident. It comes from a clear website design process: know your goals, understand your visitors, plan the structure, design with purpose, build carefully, test thoroughly, and keep improving after launch.
Each step supports the next. Strategy guides the sitemap. The sitemap shapes the wireframes. Wireframes lead to visual design. Design and content shape the development. And testing makes sure everything works before real visitors arrive.
Whether you’re hiring a web design agency or building your own site, understanding these stages puts you in control. You’ll ask better questions, give clearer feedback, avoid expensive mistakes, and launch a website that actually works for your business.
Ready to start? Begin with one simple step: write down what you want your website to achieve. Everything else follows from that.
Frequently Asked Questions
What is the website design process?
The website design process is a step-by-step method for planning, designing, building, testing, and launching a website. It starts with goals and research, moves through wireframes, design, content, and development, and ends with testing and launch. Following it keeps the project clear and organized.
What are the main steps in website design?
The main steps are discovery and strategy, research and planning, wireframing, visual design, content creation, development, testing, and launch. After launch, you keep improving the site using visitor data. Each step builds on the one before it, so skipping steps often causes problems later.
How long does it take to design a website?
Most websites take between 4 weeks and 6 months. A simple business site usually takes 4 to 8 weeks, while online stores and custom websites take longer. Slow feedback and late content are the most common reasons projects run behind schedule.
What is the difference between a wireframe and a mockup?
A wireframe is a simple black-and-white layout that shows where things go on a page, like menus, images, and buttons. A mockup adds colors, fonts, and real images to show how the finished page will look. Wireframes plan structure, while mockups show style.
What is the difference between UX and UI design?
UX design focuses on how a website works and feels, such as how easily people find information or complete a purchase. UI design focuses on how it looks, including colors, fonts, and buttons. A good website needs both to be attractive and easy to use.
Why is content important in the website design process?
Content shapes the design. Real headlines, text, and photos often change how a page needs to be laid out. When content is ready early, the design fits naturally and the launch stays on time. Clear, helpful content also guides visitors and supports search engine rankings.
What should be tested before launching a website?
Test all links, forms, and buttons, and check that the site works on different browsers and devices. Also check page speed, basic SEO settings, and accessibility. Finally, ask a few real people to complete simple tasks, like finding the contact page, to spot problems early.
What happens after a website launches?
After launch, you track how visitors use the site with tools like Google Analytics. Look at popular pages, exit points, and clicks. Then make improvements, fix issues, and add fresh content regularly. A website is never truly finished, and steady updates help it perform better over time.